Do you feel something's missing when entering a room? Your walls might look dull due to age or scuff marks. A fresh coat of paint can transform any space, adding brightness, coziness, and style. However, painting requires more than just applying color—it demands technique to avoid streaks and uneven coverage. Here's how to paint like a pro.
Do you feel something's missing when entering a room? Your walls might look dull due to age or scuff marks. A fresh coat of paint can transform any space, adding brightness, coziness, and style. However, painting requires more than just applying color—it demands technique to avoid streaks and uneven coverage. Here's how to paint like a pro.
Step 1: Gather Your Supplies
Make sure you have everything you need to do the task properly. The most frustrating thing is to stop in between the process to go to the store for something.
1. Paint: A quality paint is needed for your room.
2. Primer: A primer needs to be used as a base when painting over dark colours or stains.
3. Paint rollers and brushes: Use paint rollers together with brushes, where angled brushes make it easier to handle corners along with edges.
4. Painter's tape: For making clean, sharp lines across the corner, apply tape.
5. Drop cloths or plastic sheets: You should use drop cloths together with plastic sheets as protective barriers for your floors and furniture.
6. A paint tray and liner: Try to pour some paint for easy application.
7. Sandpaper or a sanding block: A sanding block and sandpaper both work to remove surface irregularities.
8. A ladder: A ladder proves necessary for reaching high walls and ceilings.

Step 2: Prep Your Walls for a Flawless Finish
Mostly, people neglect to make preparations before painting and they cause damage to their interior spaces. A flawless finish and a professional look are the outcomes of properly preparing the wall before painting.
1. Clean your walls: If the walls are not clean will stop paint from adhering properly. Dry walls should be cleaned with either a wet cloth or a diluted cleaning solution.
2. Fill holes and cracks: Use filler material or spackle to patch up all holes and cracks that appear on your walls. Apply sandpaper to smooth the area after drying.
3. Tape off trim and edges: The Painter's tape should cover baseboards door frames and windows to prevent paint from reaching onto undesired areas.
4. Prime if needed: A primer application becomes necessary for dark painted walls, stains or uneven surfaces because it makes an even surface for your new color.
Dedicating sufficient time to this phase will result in a smooth finish.
Step 3: Select the Right Paint
There are different types of paints. Every paint has different characteristics. A wall's final appearance and durability depend on the type of paint you select.
1. Matte/Flat Paint: It excels at concealing defects on walls but requires extra effort for cleaning. They are best for ceilings and low-traffic areas.
2. Eggshell/Satin Paint: This paint is a little glossy and provides optimal cleaning features while maintaining its elegance, which works best for living rooms and bedrooms.
3. Semi-Gloss/Glossy Paint: It is durable and easy for regular cleaning which works well for kitchen and bathroom walls and trim.
Choose the colour carefully. Bright shades give the sense of expanded space and bright effects, whereas using dark shades adds elegance and warmth to interior spaces. Use samples on the wall to help you decide on your ultimate wall paint color before deciding.
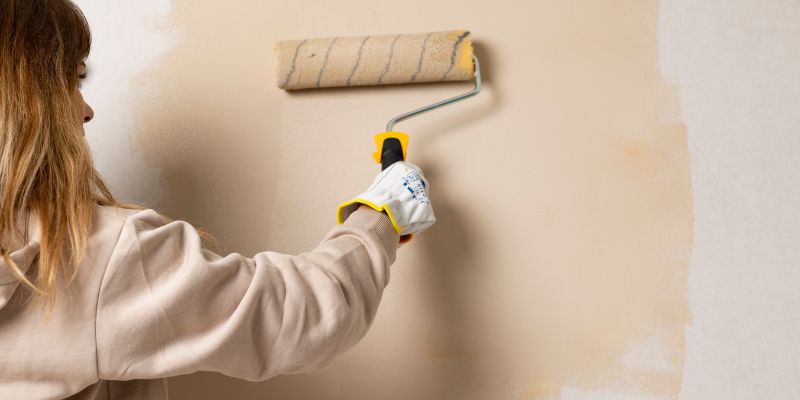
Step 4: Master the Painting Technique
The most fascinating activity is painting a wall. Following the proper steps can ensure a finished look.
1. Start with the edges: Before using a roller on the visible portions of the wall, paint the edges with a brush. Users may draw separate lines by using the "cutting in" technique.
2. Use a roller for large areas: For covering broad wall surfaces, use a roller tool. First, soak it into the paint tray, then remove the excess before applying the paint. To achieve an even distribution of paint use either a "W" or "M" fluid motion.
3. Apply thin coats: It is better to spread your paint over the surface using thin coats instead of using thick coats at once. Thick application of paint takes more time to dry properly and results in uneven results such as drips and streaks.
4. Let each coat dry completely: You should wait until each coat completely dries according to the paint manufacturer guidelines before starting the next application. Moving fast to the next step results in both peeling issues and unsmooth color appearance.

Step 5: Clean Up Like a Pro
After completing painting tasks, it is essential to perform the post-painting cleanup process. Making an effort today will make it easier for the future.
1. Remove painter's tape carefully: You should slowly pull away painter's tape from walls using a 45-degree angle when the paint is semi-wet to stop the peeling.
2. Clean your brushes and rollers: For cleaning, use warm, soapy water for latex paint brushes or apply mineral spirits on oil-based paint rollers.
3. Dispose of paint properly: Throw away any unused paint through proper disposal channels instead of discharging it into drains. Store paint properly for later touch-ups or bring it to a recycling centre.
4. Rearrange your furniture: After the paint dries, you can replace the furniture to see your completely transformed room.
Step 6: Enjoy Your Freshly Painted Space!
Learning to paint walls professionally is not as complex as people expect. Following proper preparation, appropriate tools and proven techniques allow you to produce perfect professional-quality results for your space transformation. A tiny quantity of paint may produce a visible difference between the current walls and your preferred style, whether you pick dramatic walls or basic restoration.
So, what are you waiting for? Collect your accessories, turn on the music, and start painting! Your home is transforming into a better look than ever.
- Share this article:
-
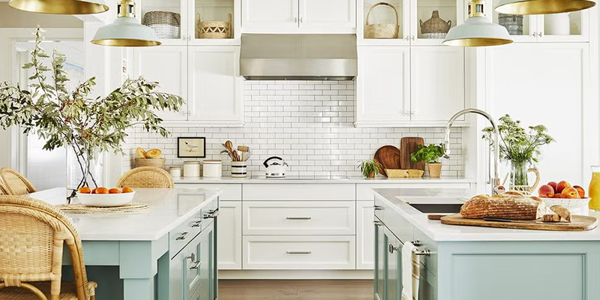
![Top Kitchen Trends For 2025: From Smart Appliances To Minimalist Designs]() Home & Garden
Home & Garden - Top Kitchen Trends For 2025: From Smart Appliances To Minimalist DesignsLet the kitchen, the centre of your home, be the stage for innovative designs and technology. As lifestyles evolve, so does your kitchen, right? So, what are the newer trends in home designs? You are curious to know. We are right here. From smart appliances to minimalist home designs, we have a guide to stay on top of kitchen trends in 2025. Let's dive in, shall we?
-
![How to Manage Diabetes in Seniors]() Health & Medical Treatment
Health & Medical Treatment - How to Manage Diabetes in SeniorsLet's talk about something important: diabetes management in the elderly. I've researched this topic and want to provide advice on how to assist seniors in leading healthier, happier lives. Diabetes can be overwhelming, but small changes can add up. Let's tackle it one step at a time.